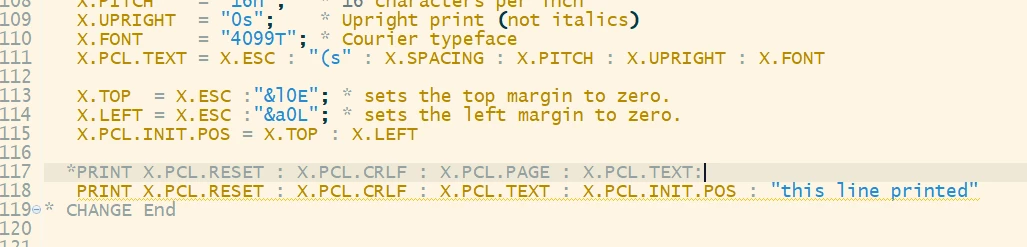
I'm almost certain that linefeeds are resulting from something as simple as PRINT CHAR(27):"E"
Is there a way to do this without causing a linefeed?
------------------------------
Shawn Waldie
enterprise application developer
Rocket Forum Shared Account
Los Angeles CA US
------------------------------